Posted in Web Development • •
Add Graphical CMS to Your Static Site
How to add a graphical CMS to manage contents of a static site

Static sites are fast and secure. There is no server logic to run, no database query to make. Also, there is almost nothing to hack because, the whole thing is all about static html pages. But, one short coming (or not?) of static site is to manage your site's contents through markdown. Many people love markdown, including me. But sometimes it's time consuming and/or error prone to manage all the texts and media through markdown.
Here comes the graphical CMS to manage static site!
Add Netlify CMS to Your Static site
I will focus on Hugo static site generator's implementation in this article. But, the methodology are almost similar for every other SSGs out there.
If you have a static site integrated with a marketplace theme or your own theme, then skip the next step and jump to this section
Build a static site
Create a new Hugo site (replace MY_SITE_NAME with your preferred name):
hugo new site MY_SITE_NAME
cd MY_SITE_NAME
Create layouts directory and create an index.html file there.
mkdir layouts
cd layouts
touch index.html
Now, open the index.html file with your favourite text editor and paste the HTML given below:
<!DOCTYPE html>
<html lang="en">
  <head>
    <meta charset="UTF-8" />
    <meta name="viewport" content="width=device-width, initial-scale=1.0" />
    <meta http-equiv="X-UA-Compatible" content="ie=edge" />
    <title>Document</title>
  </head>
  <body>
    <h1>Nice. It's looking good already.</h1>
  </body>
</html>
You can add contents (blog posts, static pages) and data (section specific data):
touch content/.keep data/.keepIntegrate Netlify CMS
The admin file of the CMS should be kept in the static directory as Hugo doesn't process files from this directory and leave them as they are. Create an admin/ directory inside static directory. Create index.html and config.yml file inside static/admin/ directory:
cd static
mkdir admin
cd admin
touch index.html
touch config.yml
The index.html file will be showing the admin interface of the CMS. Paste the HTML in that file:
<!DOCTYPE html>
<html>
  <head>
    <meta charset="utf-8" />
    <meta name="viewport" content="width=device-width, initial-scale=1.0" />
    <title>Content Manager</title>
    <!-- Include the script that enables Netlify Identity on this page. -->
    <script src="https://identity.netlify.com/v1/netlify-identity-widget.js"></script>
  </head>
  <body>
    <!-- Include the script that builds the page and powers Netlify CMS -->
    <script src="https://unpkg.com/netlify-cms@^2.0.0/dist/netlify-cms.js"></script>
  </body>
</html>
The config.yml will be responsible for managing CMS configuration (not the Hugo/SSG configuration):
backend:
  name: git-gateway
  branch: main # Branch to update (optional; defaults to master)
media_folder: static/img
public_folder: /img
collections:
  - name: 'blog'
    label: 'Blog'
    folder: 'content/blog'
    create: true
    slug: '{{year}}-{{month}}-{{day}}-{{slug}}'
    editor:
      preview: false
    fields:
      - { label: 'Title', name: 'title', widget: 'string' }
      - { label: 'Publish Date', name: 'date', widget: 'datetime' }
      - { label: 'Description', name: 'description', widget: 'string' }
      - { label: 'Body', name: 'body', widget: 'markdown' }
We can't yet access the CMS locally. For that, we need to push the code to a Git repo and activate Netlify Identity service. Let's upload the code to a Git repo:
git init # Initialize a git repository
git add . # Add every file
git commit -m "Add Netlify CMS"
git remote add origin https://github.com/YOUR_USERNAME/NEW_REPO_NAME.git # Create a new repo on GitHub and add it to this project as a remote repository.
git push -u origin main
Now, login to your Netlify dashboard and click on Create New Site From Git and add a site/app in Netlify from your Git repo.
If you have a static website, may be built using Gatsby, Hugo or other SSGs ready for deployment or you want to make your already fast static website even FASTER by CDN (Content Delivery Network) based distribution for FREE then Netlify can be your best choice. Netlify provides an easy

Now, go back to the index.html file we created earlier in layouts/ directory and add this line inside the head tag:
<head>
.....
.....
<script src="https://identity.netlify.com/v1/netlify-identity-widget.js"></script>
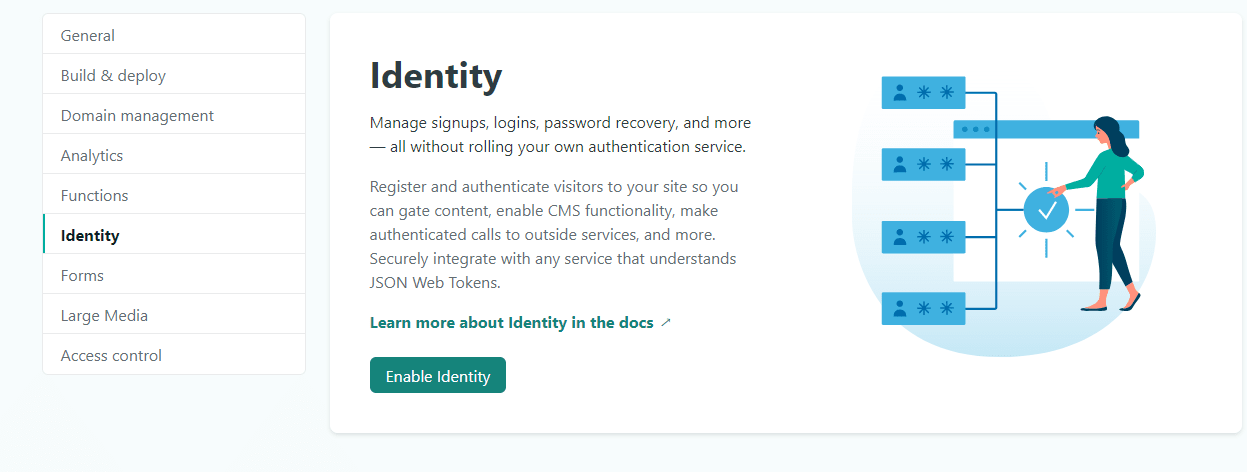
</head>In your Netlify Dashboard, select your site from the Sites --> list. Click on Site Settings > Identity > Enable Identity.
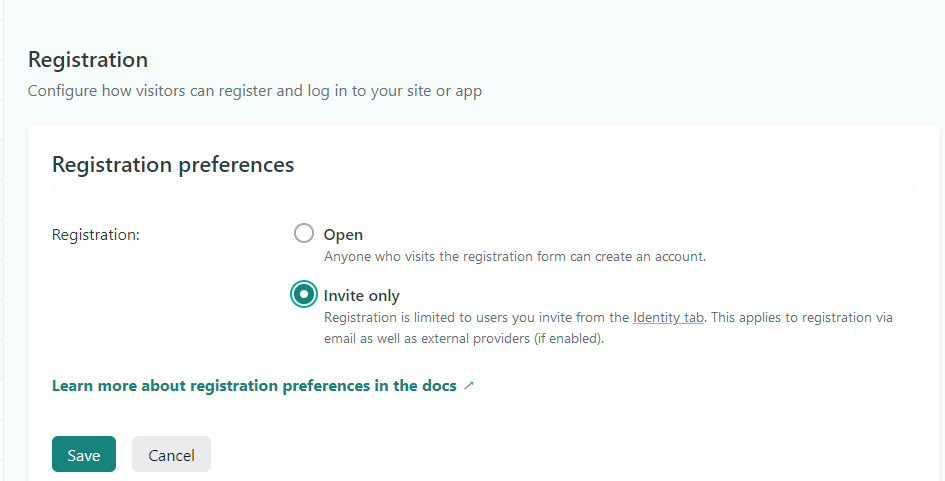
Scroll down to Registration > Registration Preference and select:
- Invite Only: If you want to invite new users/admins by yourself. Good for admin registration and personal site.
- Open: If you want any user to sign up using a sign up form. Good for sites which require mass user registration.
After that, scroll down to Services > Git Gateway > Enable Git Gateway.
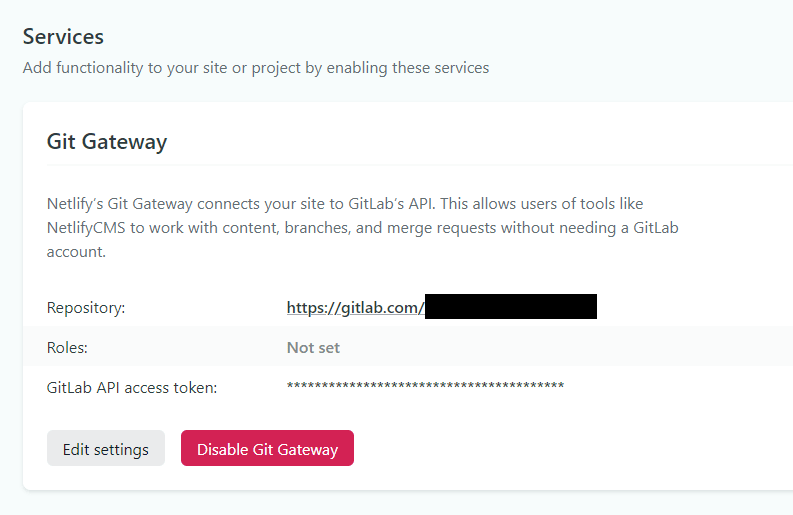
By enabling this, you are actually giving the CMS access to your Git repo for committing changes made through the graphical CMS.